 |
| RoseArt CharMinis Pack |
For some reason in 2017 I've been offered several craft and arts kits through the Amazon Vine program and I've tested out several of them. I thought some of you might be looking for chocolatey or dessert themed gifts that won't expanded your beloved's waistline so I'll share some of these kits with you. We'll start with the
RoseArt CharMinis Charm Maker Jewelry Studio Pack
with has a dessert theme that I spent hours testing out. While it is geared toward children ages 12+ there is no reason while adult might not enjoy it, too. I've been enjoying these crafting kits a lot but how did this one stack up? In this review I'm going to show you everything you'd get in the kit, we'll look at my final pieces, and I'll explain how easy or difficult it was to create them. I received this kit for free (taxes applied when I file my tax returns) from Amazon and Mattel to test and write a review about; The Chocolate Cult article you are reading is a bonus they were not expecting.
 |
| Everything from the CharMinis Pack |
The pieces are plastic but they are designed to stick together with water and a "glaze" not glue so you have no obnoxious fumes to contend with. However, when water or glaze is applied to the the charm pieces it is very sticky. I had glazed on flecks of glitter on my fingers for over a day after I finished these pieces. I used a pair of plastic tweezers from another crafting kit to help me. You must make sure that your hands are DRY to use this kit. Any moisture from water, from sweat, from high humidity makes these pieces more difficult to deal with because they stick to your skin and not each other as easily. The result of this is that in early fall when I tried this kit out for you all, we were in the middle of a heat wave again, and it took far longer for the pieces to dry than the directions in the kit say. Make extra time to use this kit, it is unlikely to be just an afternoon of crafting.
Let's look more closely at the charm pieces in the pack. Note that individual colors and numbers of each color may vary from one kit to another.
 |
| Jewelry Tree and Stand Set Up As Directed |
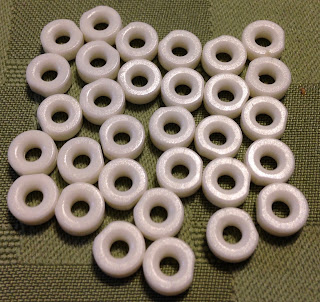 |
| White Jump Rings -- to threat cord through for jewelry |
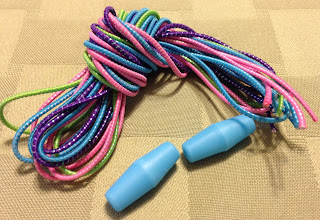 |
| Nylon Cords & 2 Safety Clasps |
The nylon cords and safety clasps were a disappointment. I ended up make 27 pieces of jewelry but had only the ability to make two necklaces or bracelets given the number of safety clasps. Plus the clasps aren't particularly easy for me to use. The cords are about 30 inches long.
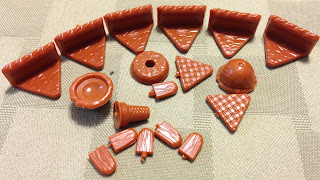 |
| Brown "chocolatey" pieces from the kit |
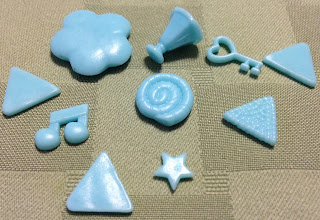 |
| Blue pieces from kit |
 |
| Pink pieces from kit |
 |
| Purple pieces from kit |
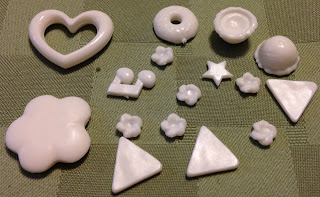 |
| White pieces from kit |
 |
| Yellow pieces from the kit |
 |
| Glitter Dome & Glitter Tray along with 3 finished pieces |
I had just enough glaze for the 27 pieces I ended up making from the kit but a lot of leftover glitter.
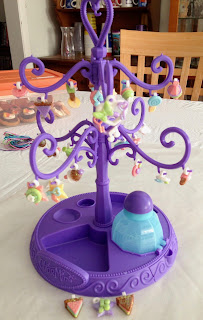 |
| Finished Jewelry Drying |
I wanted to show you one more photo so you could see how the lower arms are very close to the top of the glitter dome. I only hung the shortest pieces I made above it and only after I had glazed and glittered the other 24 pieces. Personally I would have prefered less glitter and more glaze or even more arms on the tree less awkwardly laid out.
What did my final pieces look like other than the three you've seen in the previous two photos? Check them out. What do you think?
I made two necklaces. I tried using three ten two of the nylon cords that came with the kit but they would not fit through the jump rings at all. So I went with on cord, knots on either side of the charm, trying to make them evenly spaced.
I made a series of what I'm going to call "bookmarkers" as well using some crafting cord I got at a dollar store near us. This took a long time. I needed someone to hold the charm end down so the cords wouldn't twist as I was braiding them.
If this sounds like a gift someone you love would like, please check it out. If you buy it through our links, you'll be giving back to The Chocolate Cult and me as well.


Comments
Post a Comment
Do NOT leave a url link in your comments. Leaving such links will result in deletion of your comment. If you have a product you would like featured on The Chocolate Cult contact us and we will tell you how. We charge nothing beyond the product to be tested and written about.
Comments containing insults to other commenters, to companies or brands, or which attempt to insult or denigrate any group of people may be removed by the website editor. Think about how you would like to be treated and treat everyone with respect on The Chocolate Cult.